
Hi Friends!
Last week the Fawnie girls had a little collaboration with SRM stickers. Due to my annual cousins camping trip (this was our 20th year!) and a little spill I took while I was camping (don’t worry I’m alright, just a little skinned up thanks to a run in with some gravel) I didn’t quite get finished in time to share my project on Friday. So I finished it up over the weekend and I’m here to share some of it with you today (and the rest tomorrow). Each month started as a white piece of cardstock (cut to 4.25″ x 4.25″) so you can see I did a lot of distress ink blending on each of these. I discovered some great ink combinations along the way too. I also used a lot of different Lawn Fawn stamp sets so I will list them below each photo. So without further ado…on to the project!

Winter Owl, log from Critters in the Forest & tiny snowflake from Let It Snow
Background: Tumbled Glass with Shaded Lilac on top
Background: Tumbled Glass with Shaded Lilac on top
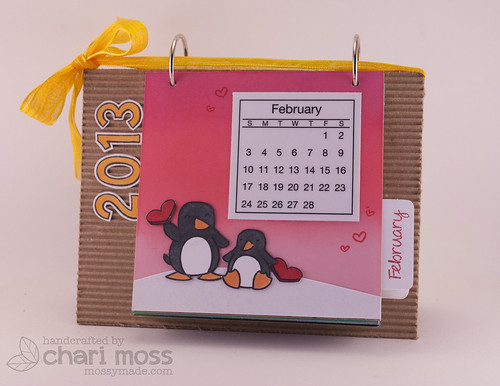
Penguins from Critters in the Snow, Valentine’s from Love n’ Breakfast, Small hearts from Plus One
Background: Spun Sugar & Worn Lipstick
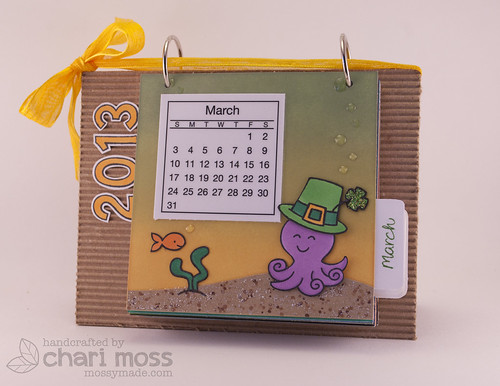
Critters in the Sea & Hats Off to You. The bubbles were made with glossy accents and the sand is kraft cardstock dotted with makers and a layer of picket fence stickles.
Background: Scattered Straw & Bundled Sage
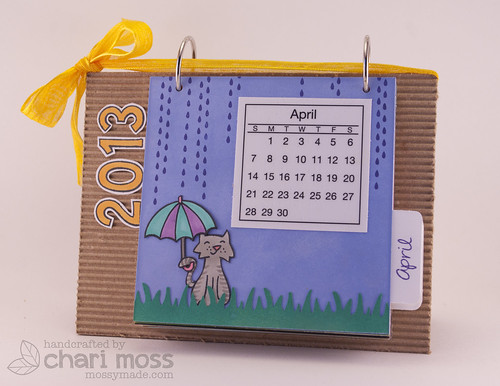
Cat from Critters in the Burbs, Umbrella from Plus One & Raindrops from Partly Cloudy
Background: Shaded Lilac Grass: Peacock Feathers
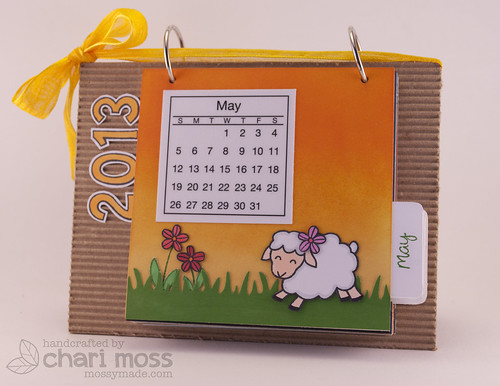
Sheep from Critters on the Farm & flowers from Blissful Botanicals
Background: Scattered Straw, Wild Honey & Spiced Marmalade Grass: Mowed Lawn
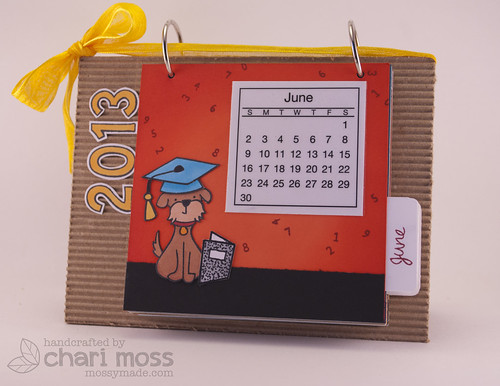
Dog from Critters in the Burbs, Hats Off to You, the composition book was created from the card in Cozy Christmas and the numbers in the background are from Check This Out.
Background: Ripe Persimmon & Barn Door
The 2013 is stamped with Quinn’s 123s and the tabs on each month were created with Say Cheese Too (this was my first time inking those month words up!). All of my images I colored with copic markers. I will be back to share the rest of the months tomorrow, I didn’t want to overwhelm you after all 🙂
SUPPLIES:
It's amazing Chari! I love it! I'll be making my mum one for Christmas TFS!
Absolute amazing project Chari. I loooove it. TFS
Fantastic project – really like seeing your Distress Ink formulas, as well.
This project is so cute! You did a great job with the backgrounds and the adorable little scenes!
*** THUD *** I just fainted! I LOVE IT. Thanks for the great ideas!
Wow, you used a LOT OF STUFF! Great project! Now I want to make a calendar. 🙂
I love this! What did you use for the base of your calendar? Is that an easel or a flat piece of corrugated cardboard?
This is aMAZing!!! It would make such a great gift too! I really want to make one. 🙂
I love this. I can't wait to see the rest. Your distress blending is amazing. I love trying new color combos. I can't wait to try yours! Will you have complete instructions on how you put the calendar together?
Thanks for sharing.
marilyn2222 @ hotmail.com
I love the Calendar. I'm going to have to make it for myself and maybe a gift. Just wondering where you get the little calendar?
[email protected]
Gorgeous calendar! love how you created each month. Did you made the little calender, if not, I would like to where you found it. Thank you for shaeing.
Carol
workmanscraps at gmail dot com
Seu calendário é lindo!!!
Parabéns!!!!
Muitas beijocas
This is so adorable, perfectly colored and arranged. I really love it and you've inspired me more than you'll know Chari!!
This turned out adorable. You're blending for the backgrounds is amazing!
Amazing work!..have always awed at your backgrounds and scenes..very lively!..thanks for the inspiration.
I really love the final result! Love the kraft base with yellow, is a very beautiful combo and combines perfectly with all the pages! Each month is totally adorable! 🙂
Oh my goodness, what a masterpiece! This is just brilliant. Seriously, swear-worthy, in the best way possible! ;o) If you'd be willing to do a tutorial on the base structure, I'd love to know how you did it!