
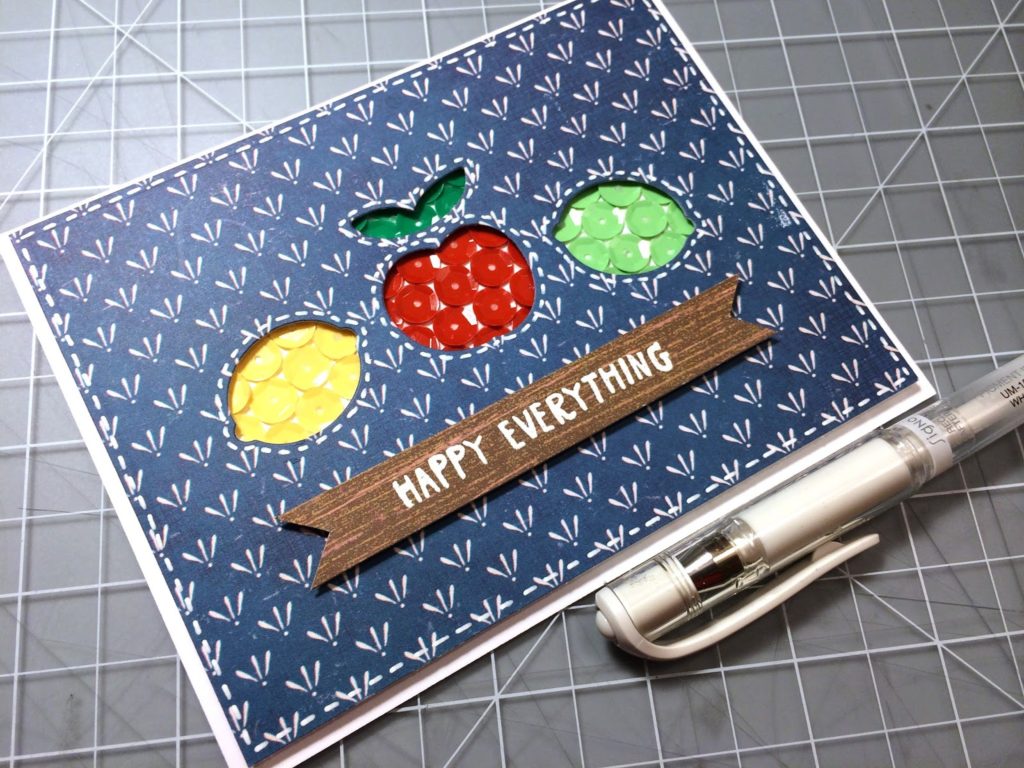
Hello!
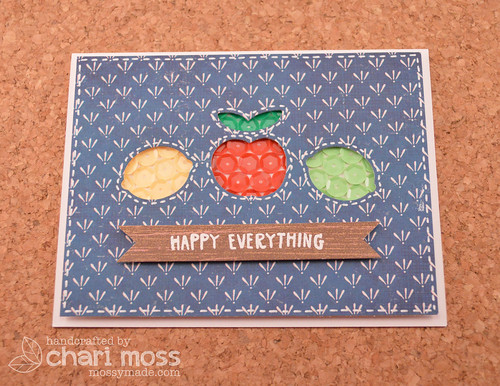
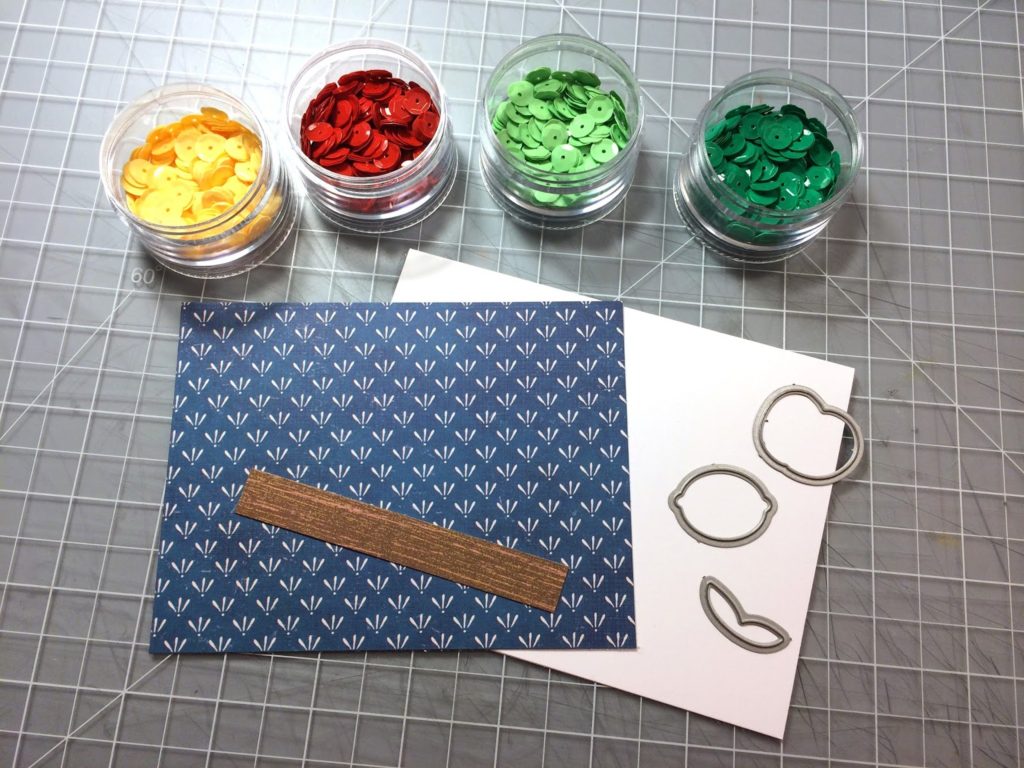
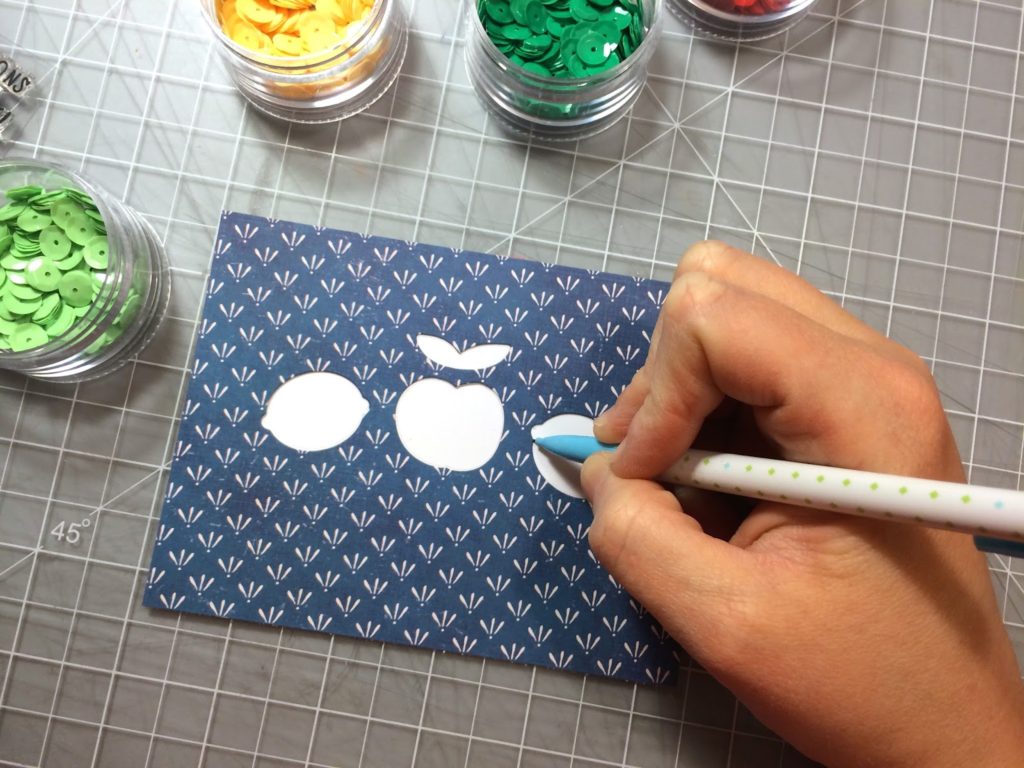
To start this project use a standard size A2 card base (4.5 x 5.5 inches) and a piece of pattern paper cut smaller than the card base. I used a pattern paper from the Studio Calico Bluegrass Card Kit for my card. I used sequins from the Essentials collection in Red, Yellow and Green and the Fruit punch dies for this card.
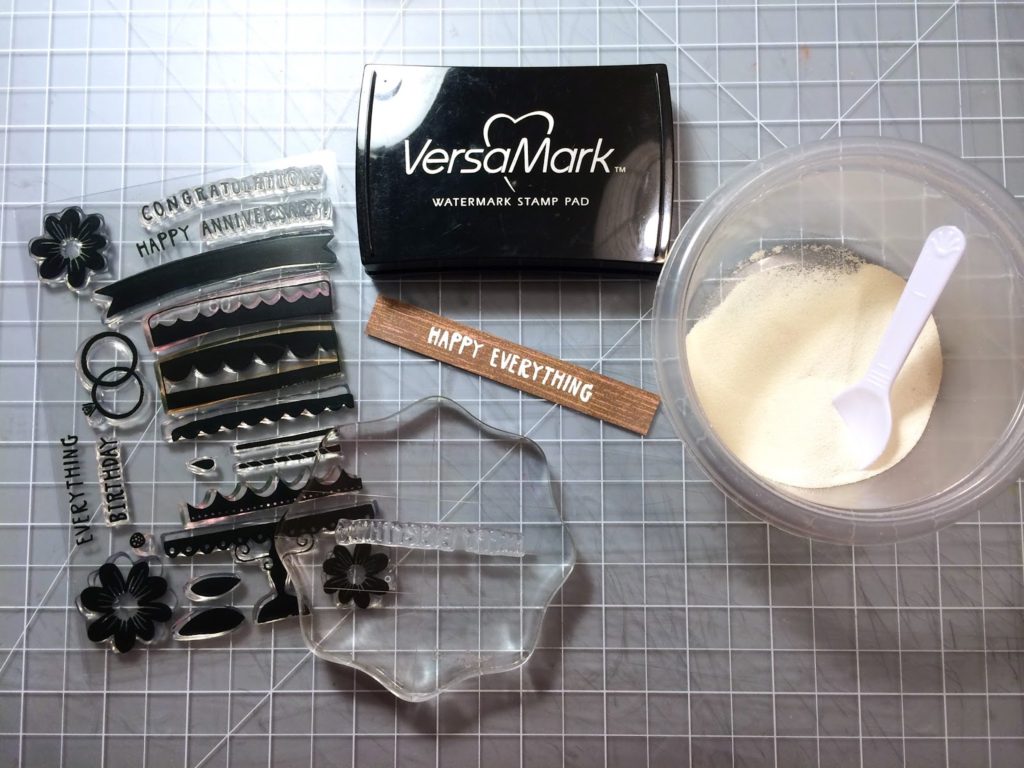
I used stamps from the Camelot Card Kit to create my sentiment banner. I stamped it in Versamark ink and used white embossing powder.
I temporary located the sentiment banner then placed the dies where I wanted the openings or images to be cut. I used post-it note tape to hold them in place.
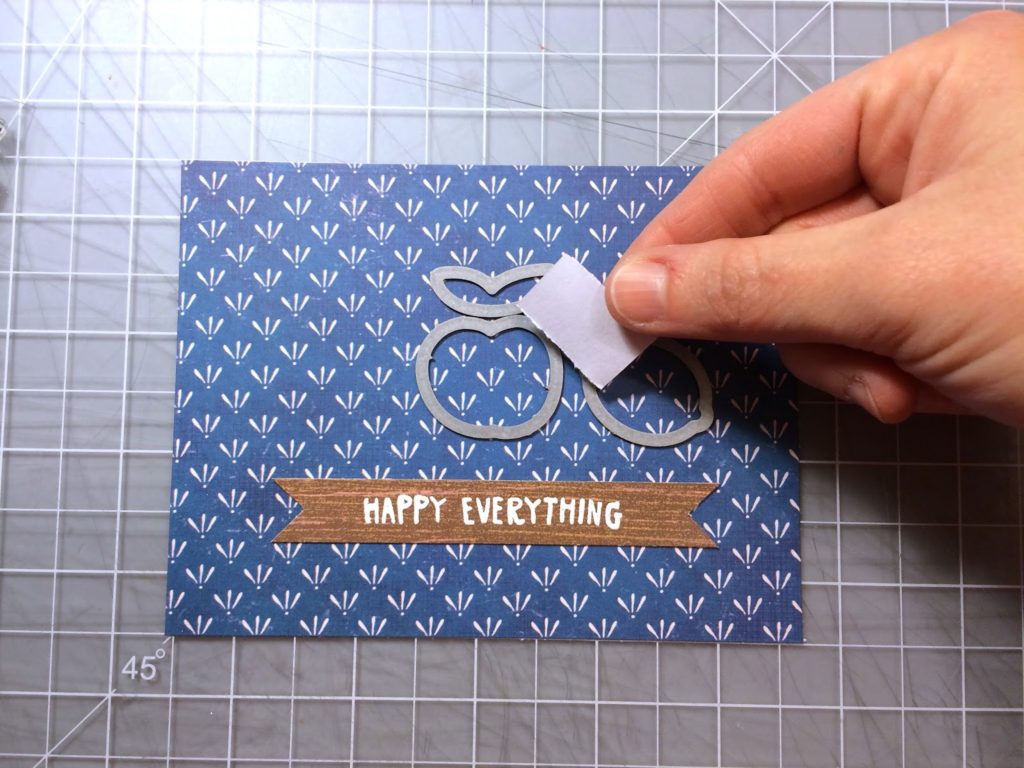
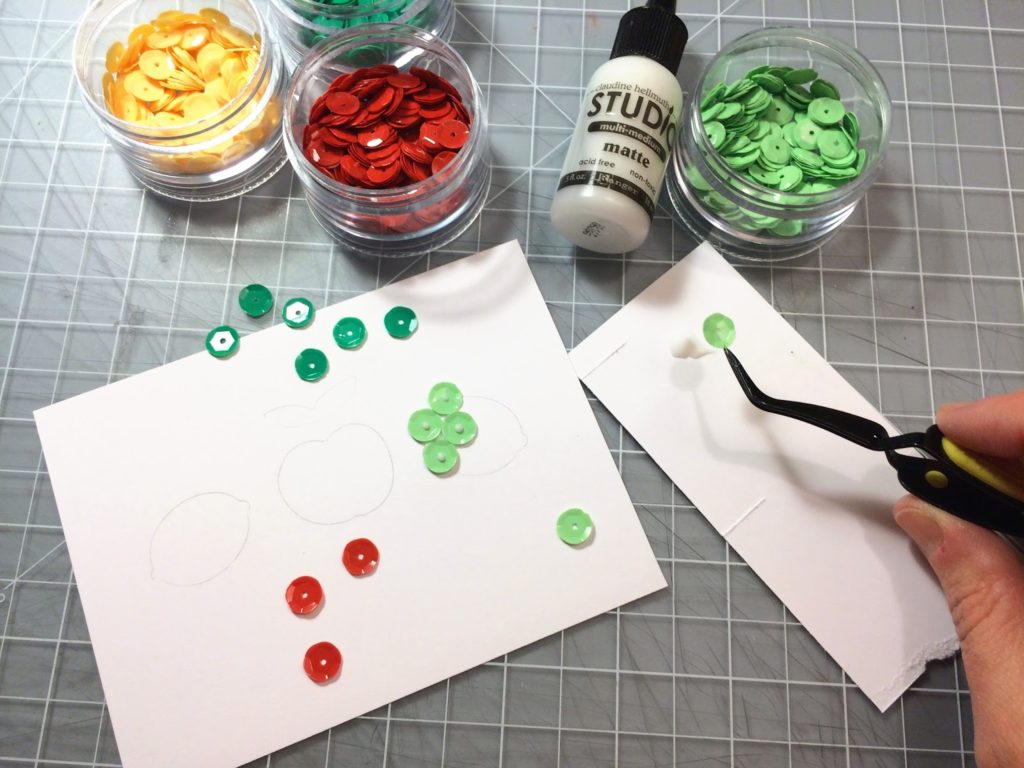
After cutting all the openings I lined up a scrap piece of white card stock cut slightly smaller behind the pattern piece. Using a pencil I lightly traced the shapes as a guide for my sequins.
I used Studio Multi medium in matte to adhere my sequins down using the outlines as guide for where each color will go. I personally like to use tweezers to place my sequins, it keeps my fingers from getting messy and the sequins don’t stick to me from the static.
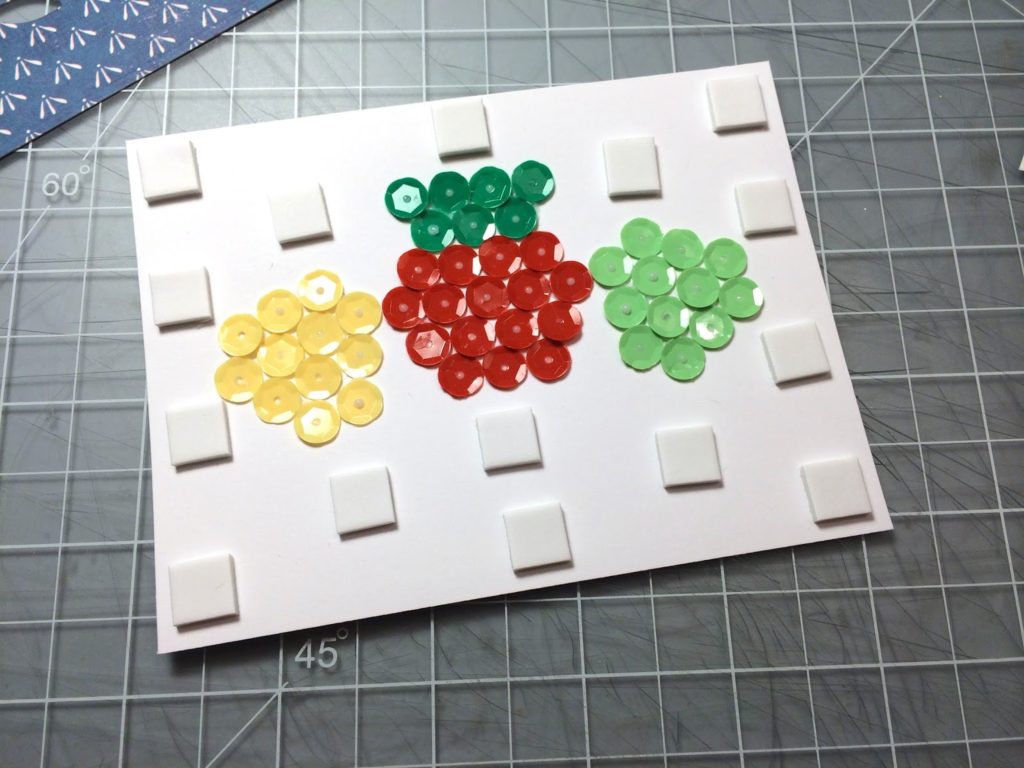
After all the sequins were adhered down and the glue has dried I placed foam adhesive all around the panel so that the pattern paper one top will stand away from the sequins a bit and stay nice and flat. I am always sure to use plenty of foam adhesive so there is no sagging spots on my front panel.
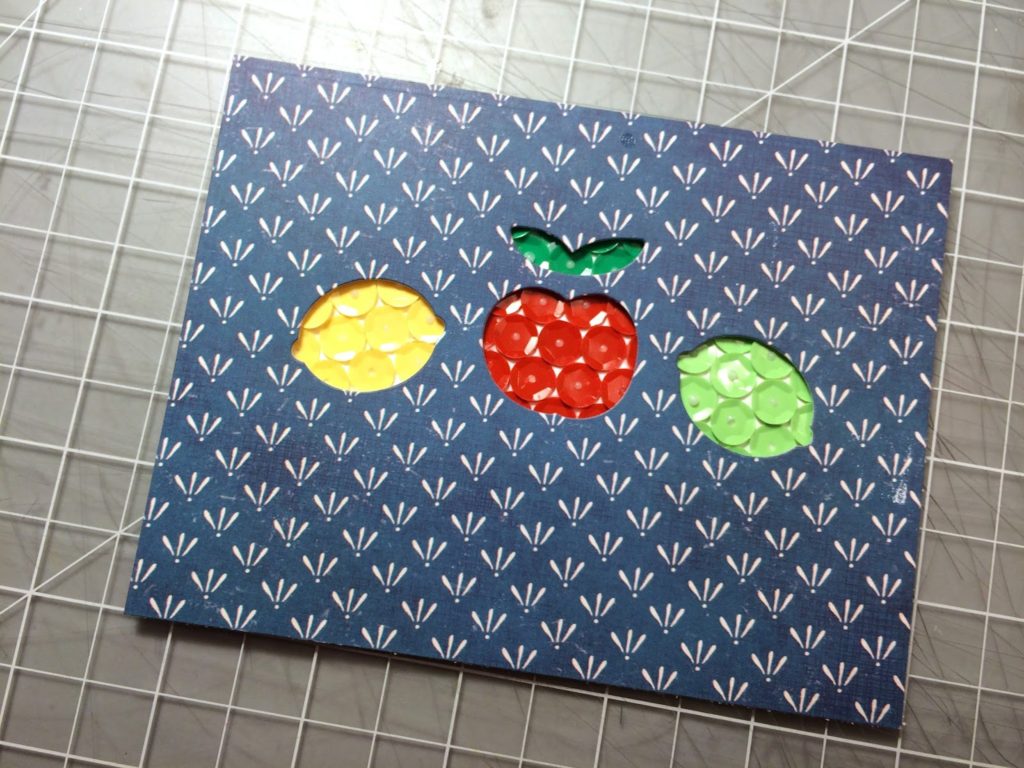
After adhering the front panel on I then adhered it to my card base, added my sentiment banner and finished it off with some faux stitching using a white gel pen.
Just another way to use die cuts and sequins and stretch your supplies. Thanks for stopping by today!
Oh my gosh! That is so awesome. You always have such clever ideas 🙂
Clever girl…such a terrific, fun card.
What a great idea! That could be done with many dies. I love your card
Great card. Thank you for the inspiration.
Another fabulous tutorial & beautiful project!
LOVE!
I love this idea!!!